If you’re willing to approach your analytics with unconventional tactics, then there are a some simple — and not so simple — ways you can find the information you need to improve your search visibility and attract more qualified traffic to your site.
I know that the sheer percentage of ‘(not provided)’ keywords that make up your reports can be frustrating and a bit overwhelming. But luckily, you can still use segmentation in Google Analytics to segment your ‘(not provided)’ data to gain a clearer understanding of how visitors arrive on your site.
Although you can’t see the exact keywords that attract your traffic, you can see where your visitors from unspecified keywords arrive on your site.
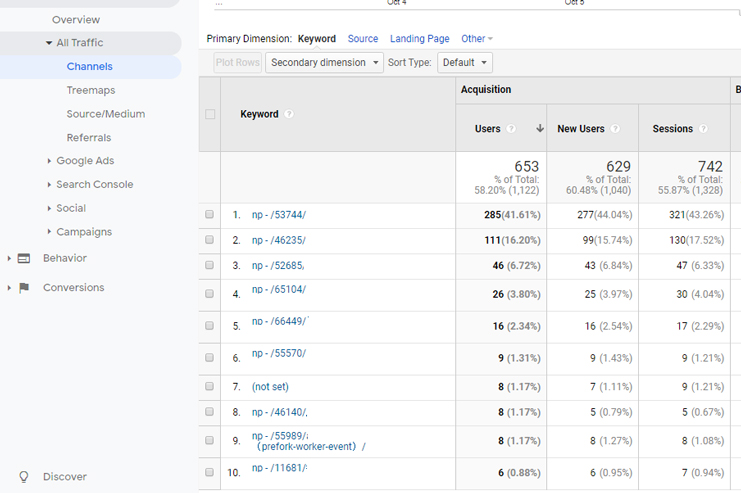
This involves setting up Google Analytics filters that show you the landing pages for all of your ‘(not provided)’ traffic. Then, you can get a general sense of which content is attracting the most visitors from organic search.
This will help you get a better understanding of the types of pages and topics are most effective in bringing new users to your site. Then, you can use this insight to make informed decisions about the kinds of content you want to create for your site moving forward.
Fortunately, creating filtered reports is a relatively straightforward process.
1. Select the view you want to apply for filtering
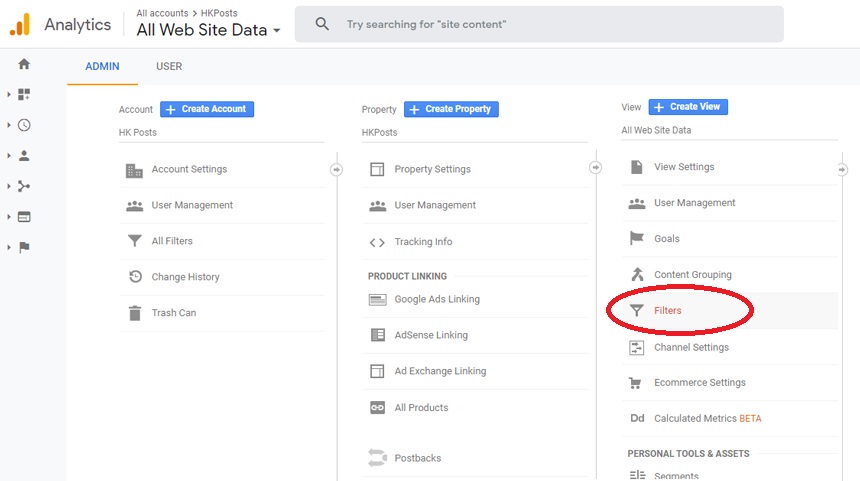
You can do this from the Google Analytics Admin dashboard under your account. Whatever you do, do not to apply this filter to all of your site’s traffic. That would eliminate important data from all of your Analytics account that you won’t be able to recover.
Once you’ve determined which view you want to work with, click “Filters.”

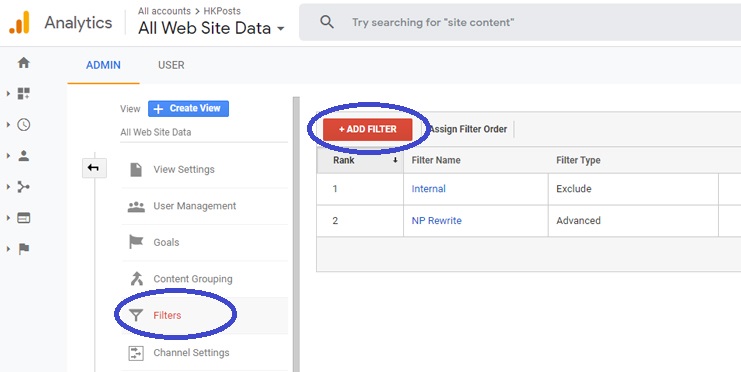
2. Add a new filter
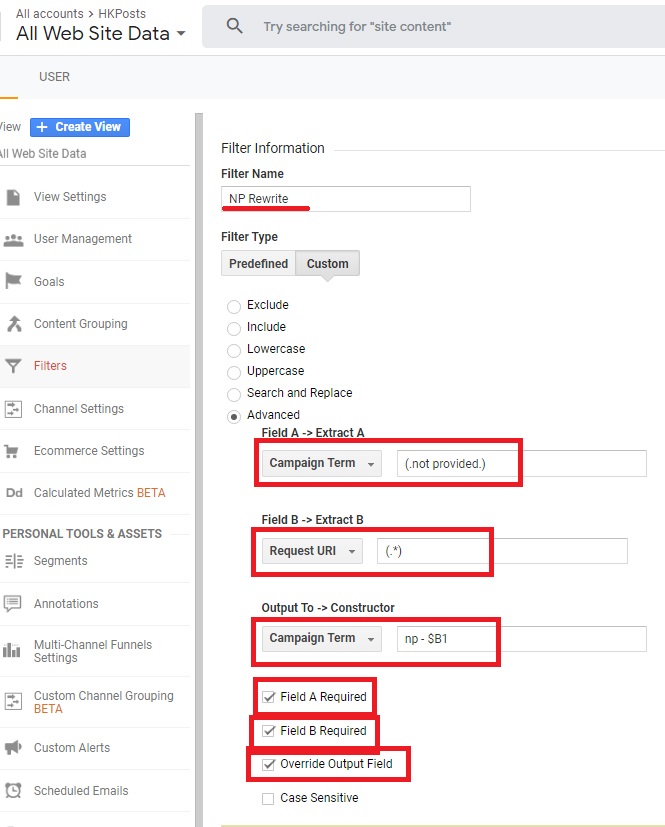
From here, click “Add Filter.” Enter “NP Rewrite” for filter name.

3. Set your filter parameters
Select “Custom” under Filter Type. Then, within the Custom Filter options, select “Advanced.”

Next, enter the following parameters (as shown in the screenshot below) into their respective fields.
- Field A: “Search Term”: (.not provided)
- Field B: “Request URI”: (.*)
- Field C: “Campaign Term”: np – $B1
Finally, check all of the boxes below these fields except for “Case Sensitive.”
Click Save and your new filter is ready.
For most sites, it will take a few days (or weeks) to collect significant data.


Be the first to comment